摘要 
对低菲涅耳数的成像系统的建模是具有挑战性的。在这样的系统中,光的传播很大程度上取决于衍射,为了正确地对整个系统进行建模,必须考虑多个表面和孔径上可能的衍射。通过VirtualLab Fusion中的傅立叶变换设置,可以灵活地调整此类衍射效果的包含范围。在此示例中,我们显示了由于低菲涅尔数系统内部的透镜孔径和针孔而引起的衍射效应。 建模任务 在低菲涅耳数系统中,我们展示 -针孔如何截断中间像面上的光 -如何计算最终像面上的光斑大小 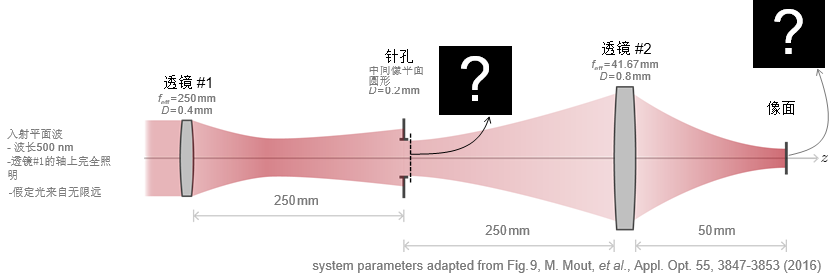
在透镜 #1后面的场的传播 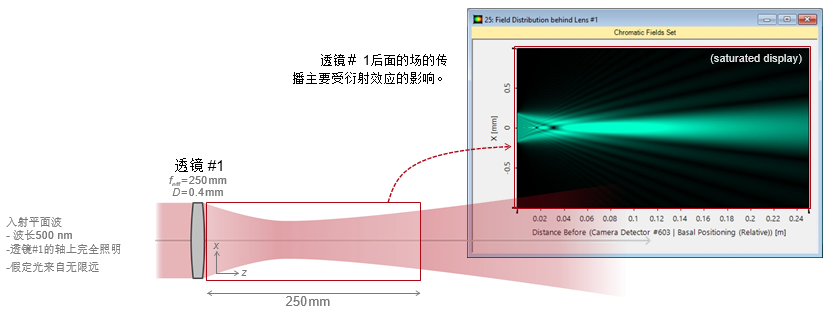
在针孔前后 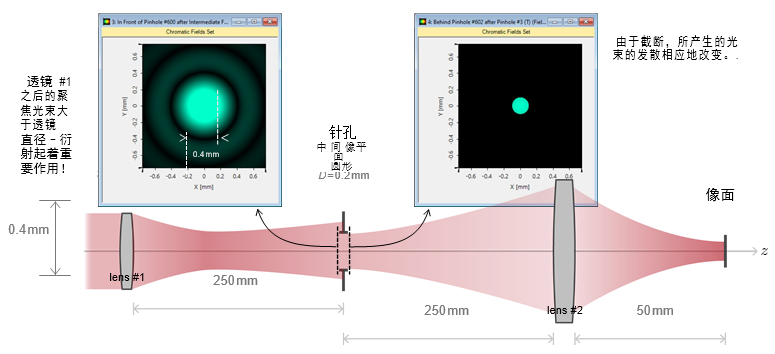
像面处的焦点 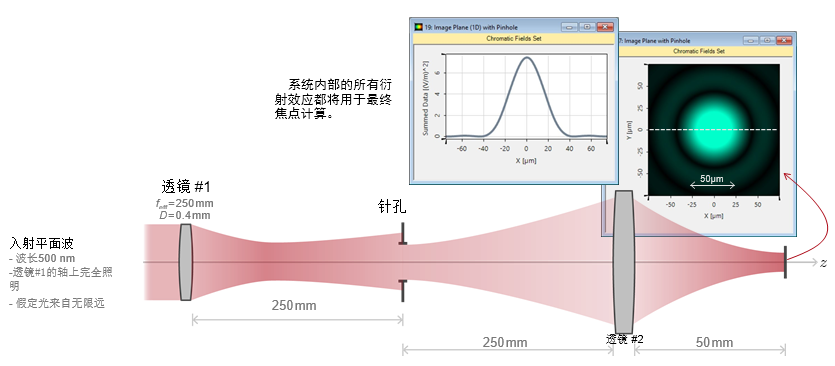
无针孔时像平面上的焦点 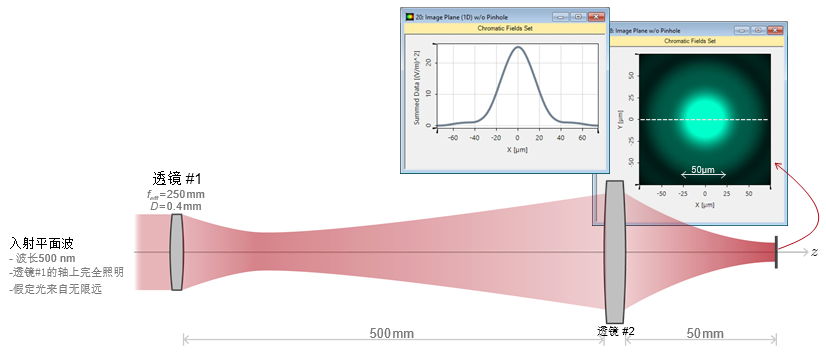
对比:有针孔和无针孔 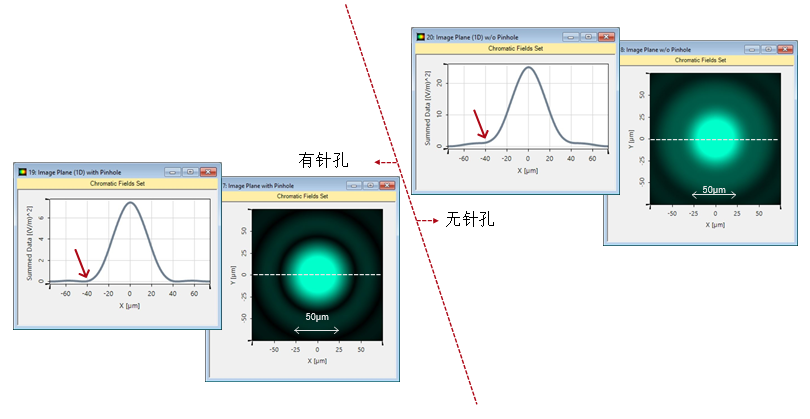
附录:出瞳衍射(EPD)方法 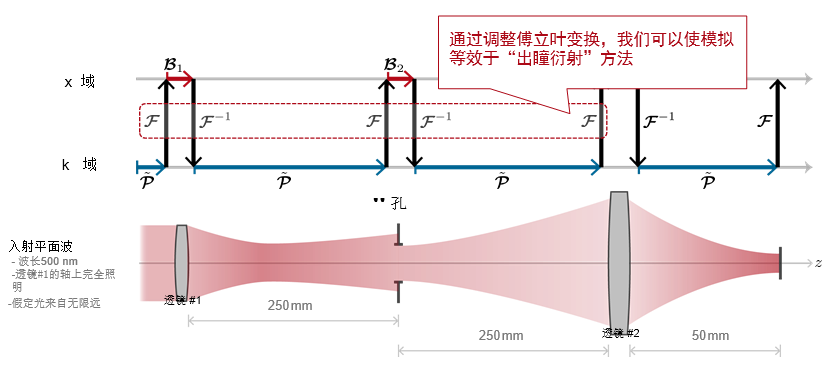
附录:出瞳衍射(EPD)方法 
附录:出瞳衍射(EPD)方法 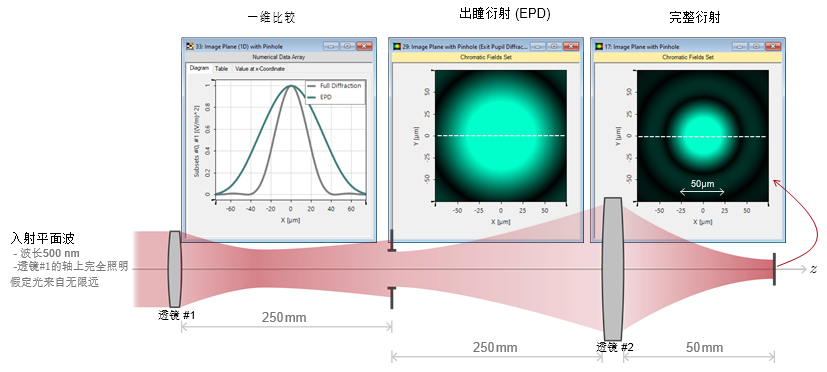
VirtualLab Fusion的操作 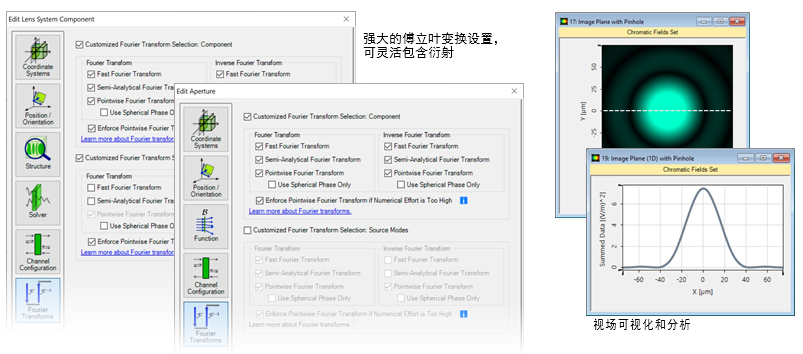
VirtualLab Fusion操作流程 • 设置元件的位置和方向 − LPD II: Position and Orientation [Tutorial Video] • 根据情况正确设置傅立叶变换 • 使用参数运行沿z轴扫描 − Usage of the Parameter Run Document [Use Case] 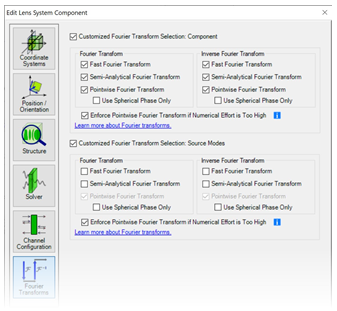
VirtualLab Fusion 技术 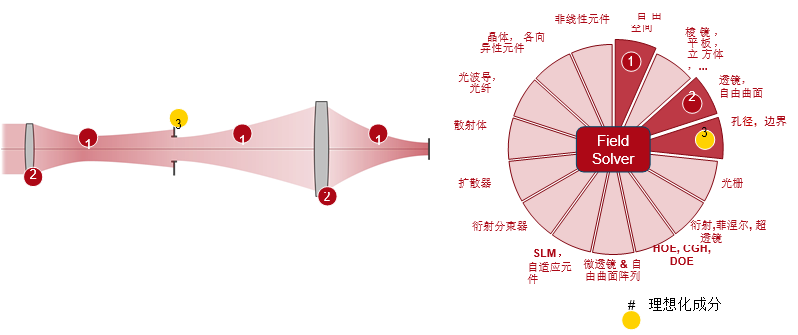
| 


